Chapter 19: A Geodjango template
We want to create some templates. In Django, a template contains the static part of the desired HTML output as well as some syntax that describes how a dynamic content will be inserted.
We will create some templates for:
Our geolocations homepage.
Our geolocations responses
A webmap for where each of our surveys took place
Create the templates folder
Within our geolocations app, create templates folder and within it create the geolocations folder. We use this naming convention of app_name/templates/app_name to avoid clashes with other apps that may have the same name.
Within the geolocations/templates/geolocations directory, create an index.html file. So your templates structure will look like:
geolocations
├── apps.py
├── templates
│   └── geolocations
│       └── index.html
Within the index.html file, insert the below content.
<!DOCTYPE html>
<html lang="en">
<head>
<meta charset="UTF-8">
<meta name="viewport" content="width=device-width, initial-scale=1.0">
<title>Geolocations app</title>
</head>
<body>
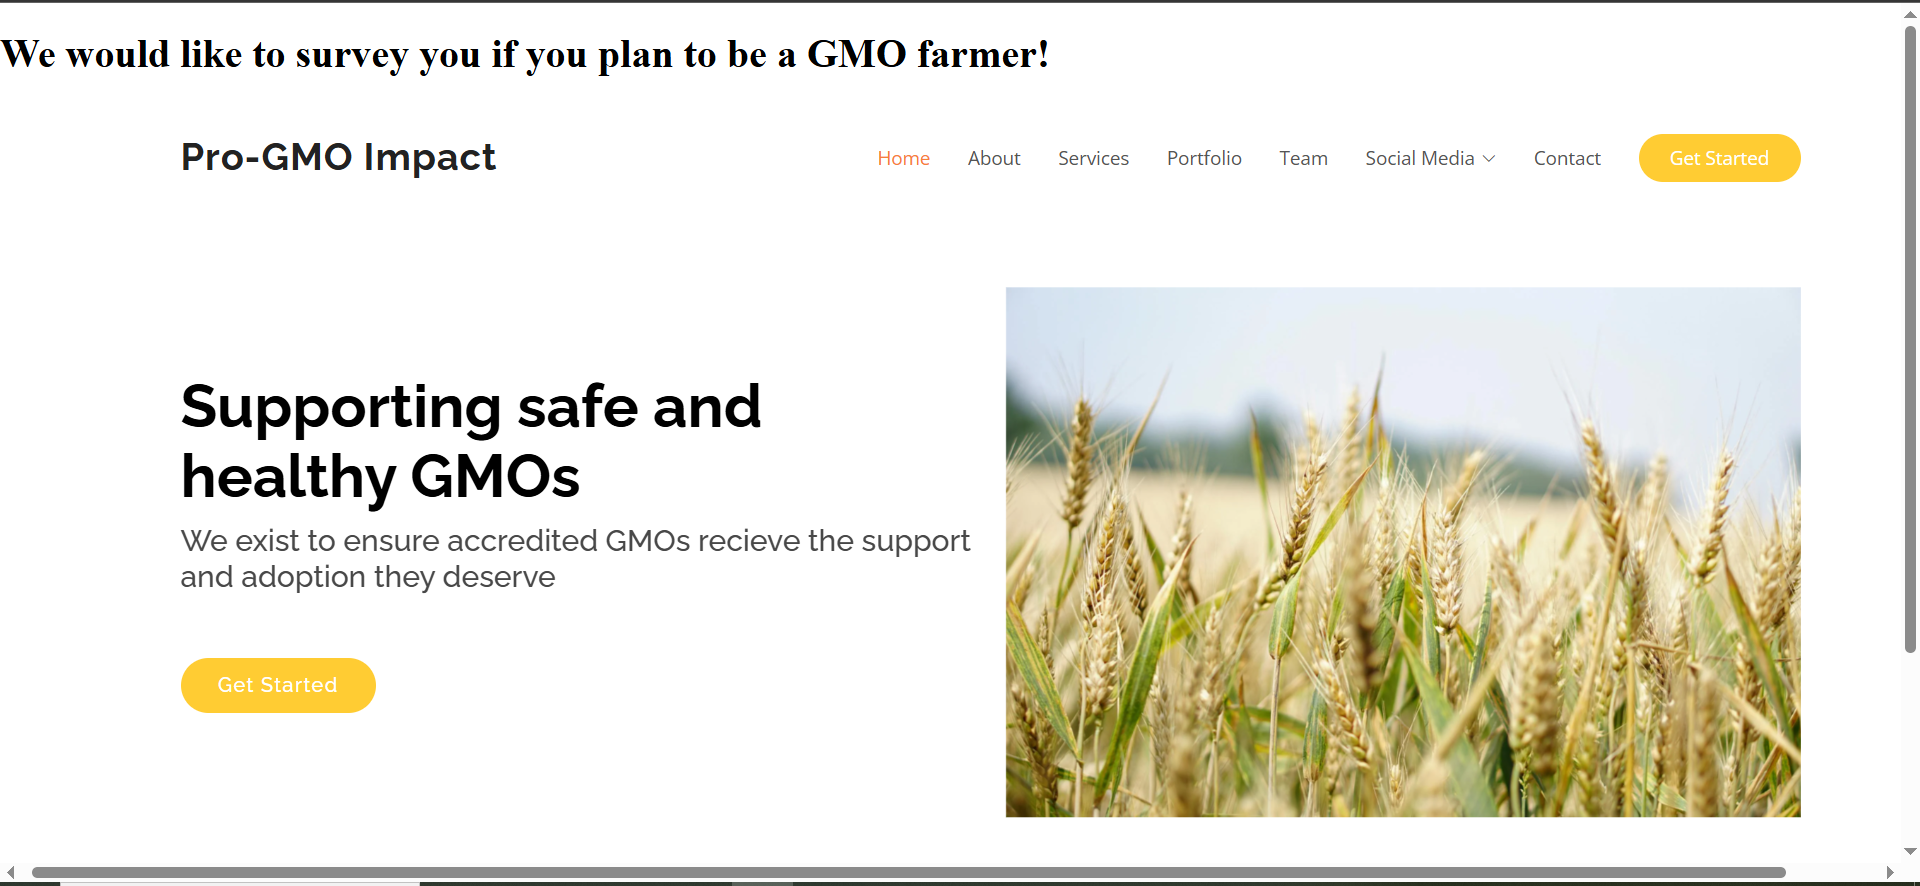
<h1>We would like to survey you if you plan to be a GMO farmer!</h1>
<embed src="https://sammigachuhi.github.io/pro-gmo-website/" type="text/html" width="1600px" height="800px">
</body>
</html>
This is a nested website that also hosts the Pro-GMO website from here. We use the <embed> tag to embed the Pro-GMO website within our index.html.
Configuring the views
Go to your geolocations/views.py file. Change the home function from returning a simple HttpsResponse via return HttpsResponse to rendering a html page via the render() function.
def home(request):
    return render(request, "geolocations/index.html", {})
Now, if you run python3 manage.py runserver and go to your local host http://127.0.0.1:8000/, you will see our homepage as below.
Create the base template
We would like to create a template that fulfills purpose #2: Our geolocations responses.
As the first thing, create a templates folder within the my_geodjango directory. Inside this templates folder, create a base.html file which shall be the base template for all of our app's templates.
templates
└── base.html
Inside the base.html insert the following content:
<!DOCTYPE html>
<html lang="en">
<head>
    <meta charset="UTF-8">
    <meta name="viewport" content="width=device-width, initial-scale=1.0">
    <title>{% block title %} Geolocation responses {% endblock title %}</title>
    <link href="https://cdn.jsdelivr.net/npm/bootstrap@5.3.5/dist/css/bootstrap.min.css" rel="stylesheet" integrity="sha384-SgOJa3DmI69IUzQ2PVdRZhwQ+dy64/BUtbMJw1MZ8t5HZApcHrRKUc4W0kG879m7" crossorigin="anonymous">
</head>
<body class="container">
    <script src="https://cdn.jsdelivr.net/npm/bootstrap@5.3.5/dist/js/bootstrap.bundle.min.js" integrity="sha384-k6d4wzSIapyDyv1kpU366/PK5hCdSbCRGRCMv+eplOQJWyd1fbcAu9OCUj5zNLiq" crossorigin="anonymous"></script>
    {% block base_content %}

    {% endblock base_content %}
</body>
</html>
In a master template, the block tag is a placeholder that will be replaced by a block in a child template with the same name. That is, the styling of the block shall remain as defined in the master template, but the content inserted shall be to your own customization.
Create the child template
Within your templates/geolocations folder, create a responses.html template. Thereafter, insert the following content:
{% extends "base.html" %}
{% block base_content %}
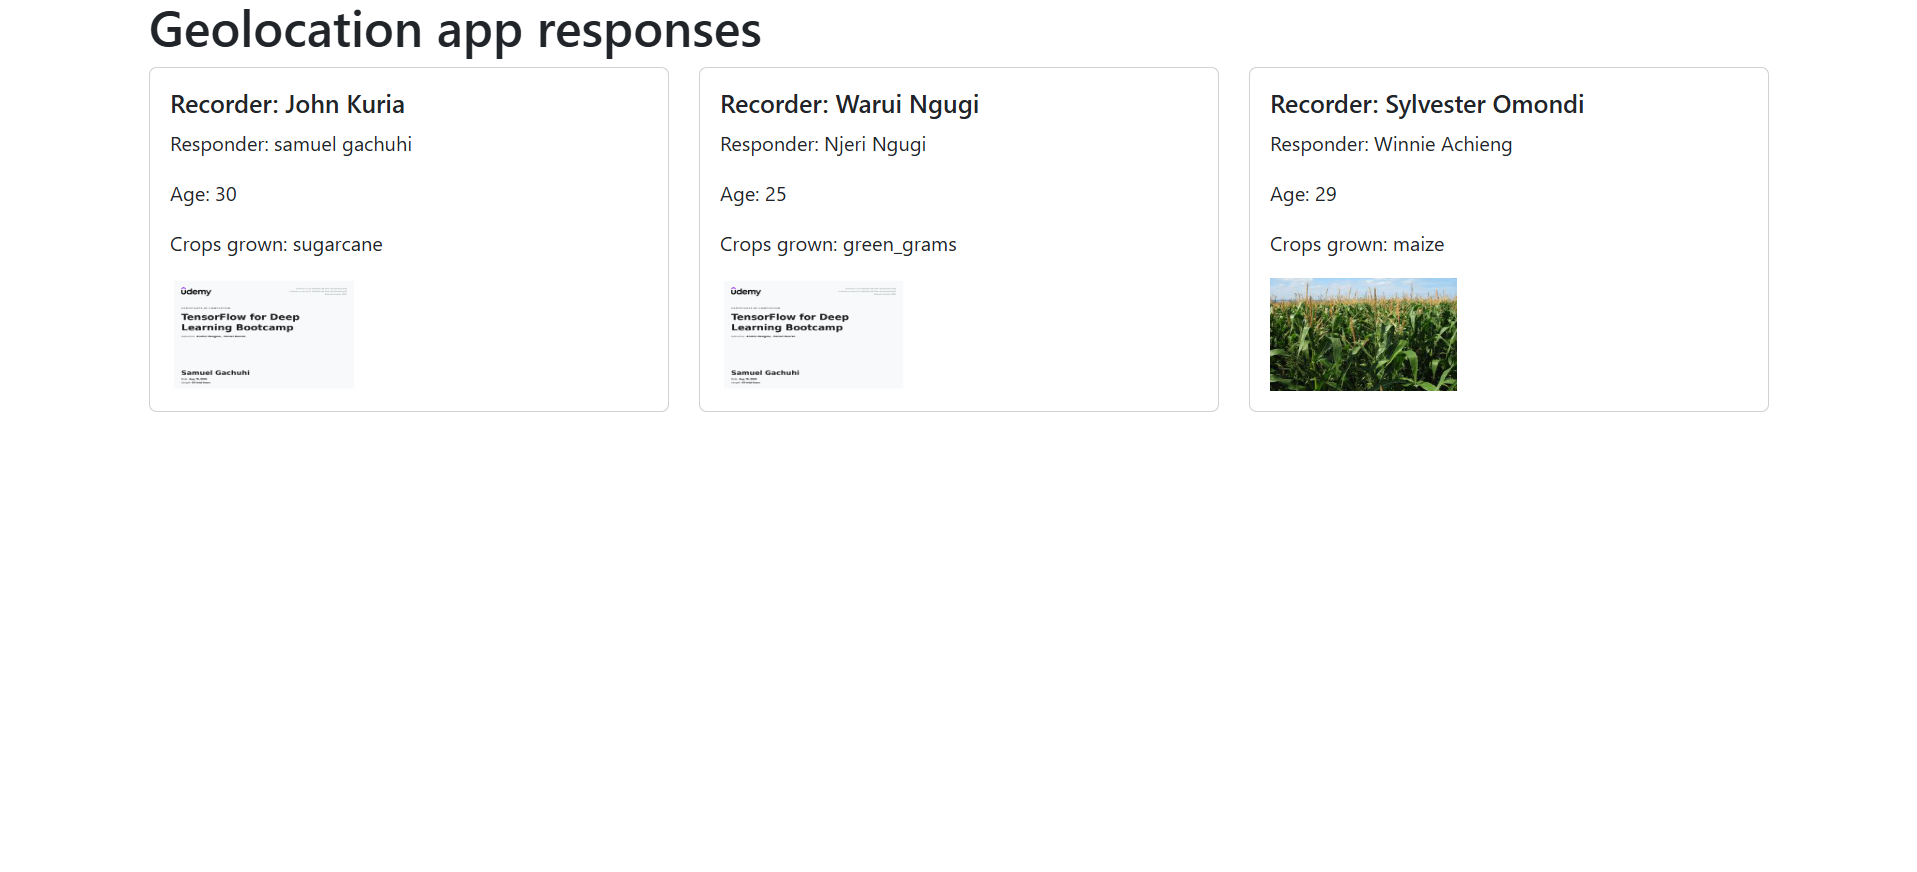
<h1> Geolocation app responses </h1>
<div class="row">
{% for response in responses %}
<div class="col-md-4">
<div class="card mb-2">
<div class="card-body">
<h5 class="card-title">Recorder: {{ response.recorder }}</h5>
<p class="card-text">Responder: {{ response.names }}</p>
<p class="card-text">Age: {{ response.age }}</p>
<p class="card-text">Crops grown: {{ response.crops }}</p>
{% if response.image %}
<img src="{{ response.image.url }}" width="150px" height="90px">
{% else %}
<p> No image available </p>
{% endif %}
</div>
</div>
</div>
{% endfor %}
</div>
{% endblock base_content %}
Here we use a for loop within the jinja template to go through every response stored in the variable called responses. You may ask, where is this value called responses stored? We shall create it in the geolocations/views.py file.
Go back to your geolocations/views.py file.
First import the Question class from your models.py file.
from .models import Question
Thereafter add the following content.
def responses(request):
    responses = Question.objects.all()
    context = {
        "responses": responses,
    }

    return render(request, "geolocations/responses.html", context)
Let's go through each variable.
The responses variable captures all content, that is, all the responses captured in the Question class. These include the recorder, names, location, age, crops, image and comments responses. It stores them inside a variable called context.
Then in the last line, we render the contents inside a static html page called responses.html which contains only a subset of the responses we want to display!
The urls.py file
Finally, in the urls.py file, we add the routing to our responses.html file.
urlpatterns = [
    path("", views.home, name="home"),
    path("responses/", views.responses, name="responses"),
]
Now when we restart our server, and go to http://127.0.0.1:8000/responses/ we can see the responses to some of our questions and their images.